¶ Measuring the strength of the foam.
¶ Introduction
First of all, this is later than I would have liked to do this. I haven't really been doing much on my project as of late. Between a rough break-up and my job taking more of my energy than I thought it would I just haven't had it in me to get work done. But getting that out of the way, onwards and upwards.
One of my main concerns for this aircraft is whether the foam will be strong enough to support the weight of the aircraft. It is surprisingly strong when formed into a wing shape, but the section I have made is only 420mm long, and the final wing is going to be nearly three times as long. I don't doubt the wing would support the weight, but when load factors in turns are considered I am far less optimistic.
To that end, I am going to perform some FEA analysis on the wing. Unfortunately, I no longer have access to Ansys Mechanical. Instead, I am either going to use the FEA plugin for FreeCAD or the simulation functionality in Solid Edge.
The slight, and by slight I mean very large, problem with this plan is that I don't know any of the properties of the foam. Of course, there's data on the properties of expanded polystyrene foam, which will be very useful when I build my hot-wire however the foam I use is of a different density and also has the paper backing which will affect the strength.
¶ Set-up
In order to test the properties of the foam, I am going to set up a small 3 point load test. A foam strip will be supported at both ends, with a weight applied to the center. By changing the weight and measuring the deflection, I can obtain the flexural's modulus from the following equation:
The setup will look like the image below. Ignore the red lock - the quirks of FreeCAD!
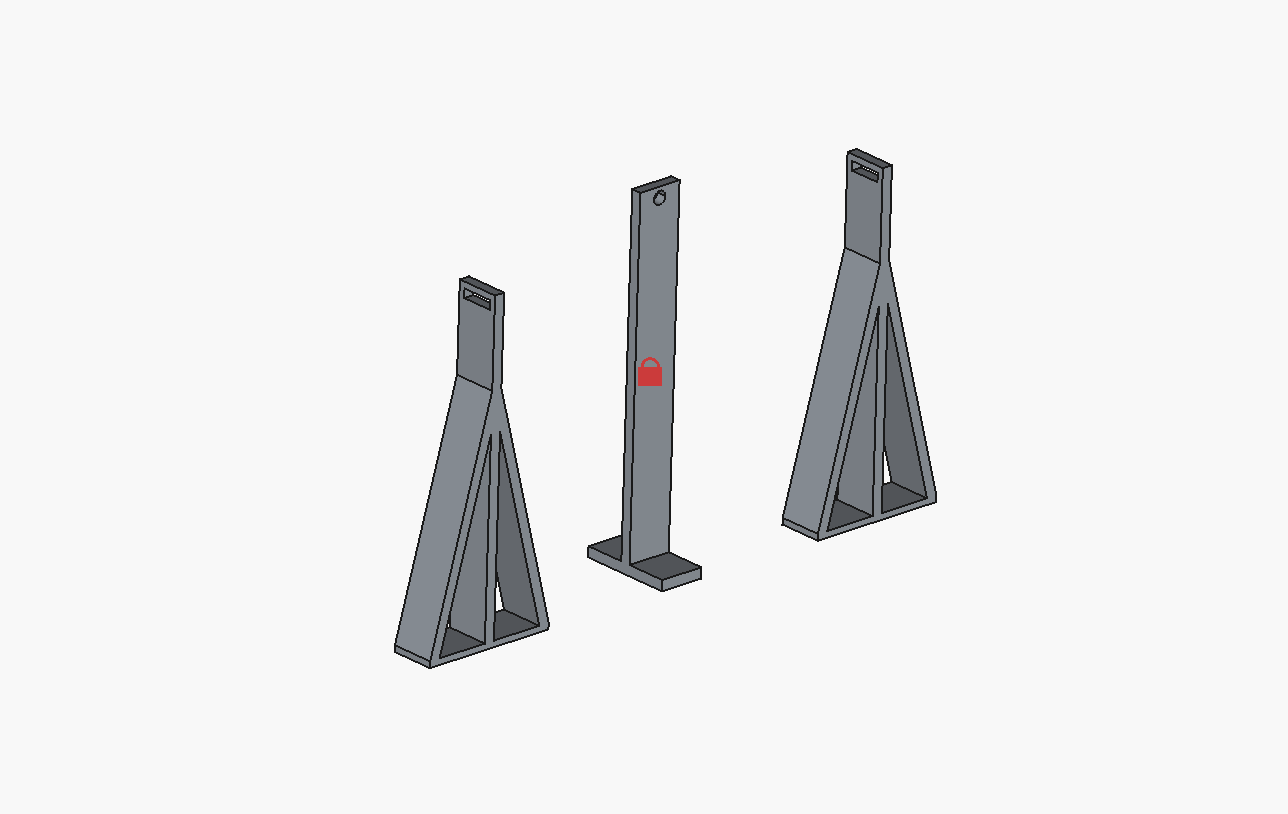
The image should be fairly self explanatory of the setup I'm going for. The foam test-piece will be supported by the two lateral supports. In the middle, I will hang a ruler from the support using a small peg. Then, as I add weight to the foam, I'll measure the deflection on the ruler. Simple.
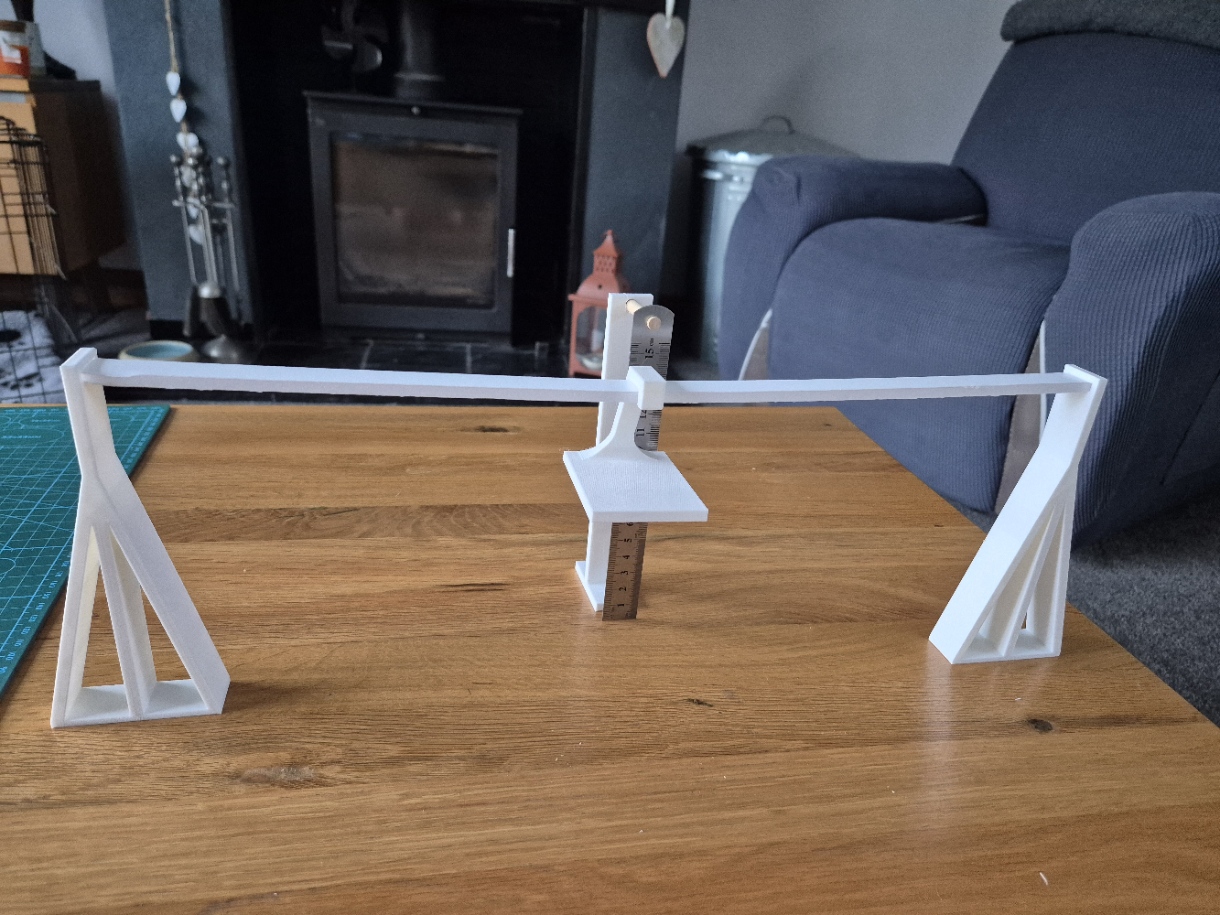
This shows the full set-up with the ruler and the hanger for the weights. To measure the deflection, I got down to eye-level and read the deflection off of the ruler. I don't think my neck will ever be the same again.
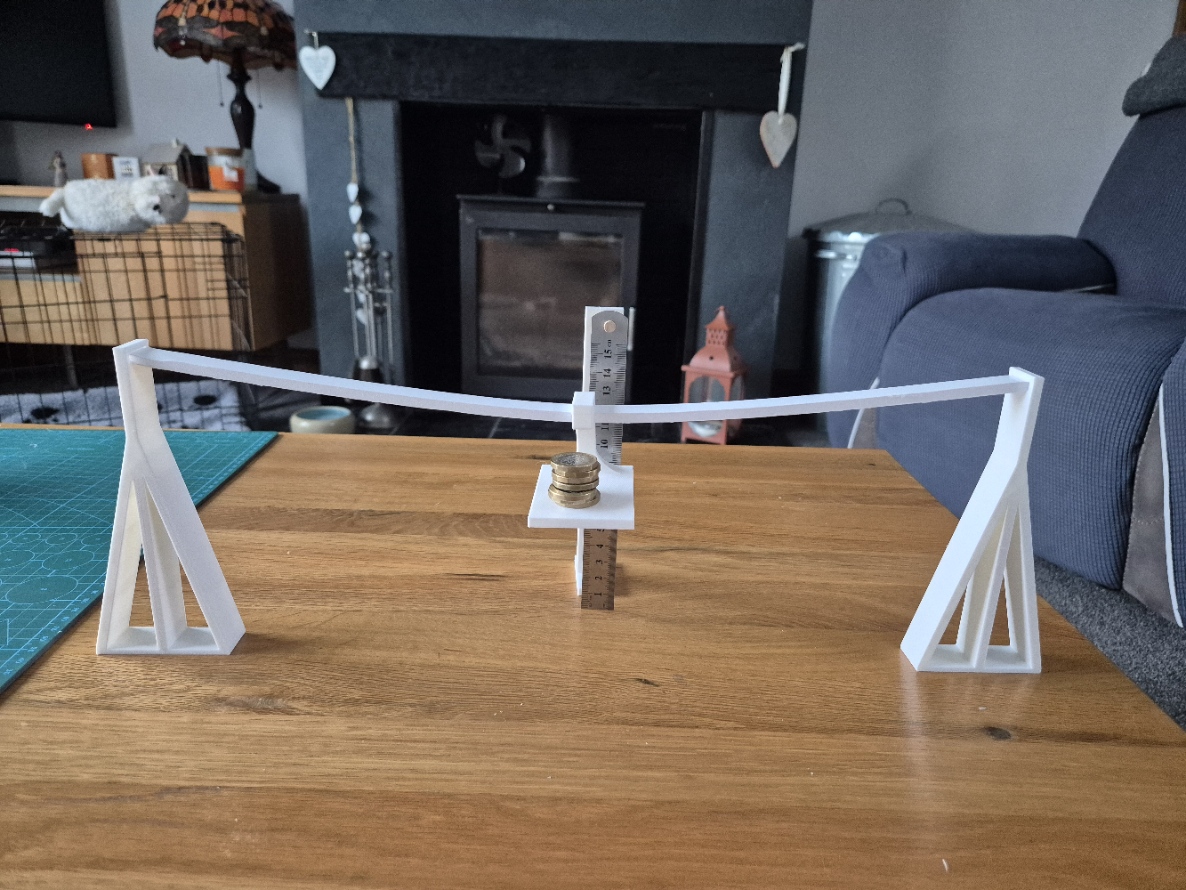
And for the weights...yes. Coins. The cheapest set of weights I could find on Amazon were £4, which isn't much, true, but you can't beat free. They all weigh about the same too, which makes things easier.
¶ Results
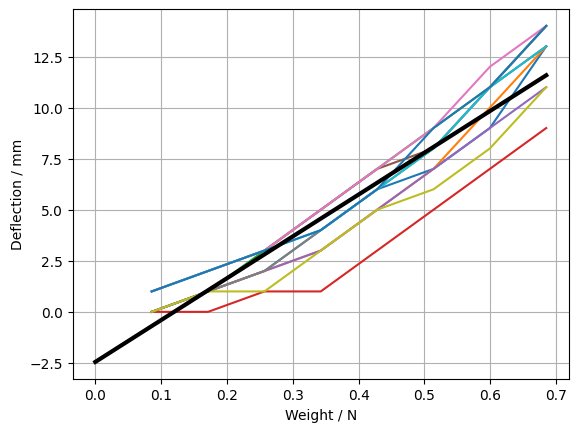
The above shows the deflection for a given weight. There is a bit of variation in the y-offset, but they show roughly the same gradient, which is the important bit. The black line shows the linear fit to the average of the values. The fact that it doesn't go through 0 on the y-axis is due to the fact that I did not include the weight of the hanger. Encouragingly, the x-value where it crosses the y-axis is exactly equal to the weight of the hanger.
The deflection-per-weight value I obtained was 0.0205mN-1. This can then be plugged into the equation to finally obtain the flexural modulus:
¶ Critical review
My favourite part: where I get to rip into myself.
Working backwards from the value I obtained, it seems like a high value. There's a lot of data out there on the strength of foams, but there's so much variation with things like density, foam structure and the paper that's present on my foam makes those values unreliable. This product from EasyComposites has a similar density, albeit slightly lower. It doesn't list flexural modulus, but does list elastic modulus (and tensile modulus? Correct me if I'm wrong, but they're the same property?) at around 20 Mpa, which is a factor of 20 lower. Does the paper really have that big of an effect on the strength?
Next up: the method used to measure deflection. Quite poor, really. The measurement relied on my ability to get perfectly eye-level, which not only is inaccurate but also quite painful after 54 measurements. Also, whilst I tried to get the ruler as close as possible to the hanger to reduce any parallax error the hanger curves out backwards to keep the center of mass underneath the beam. This meant that the ruler had a minimum distance it had to be away, and any contact with the hanger would have caused friction.
The method I used to support the beam wasn't perfect either. The equation to calculate the flexural modulus depends on the beam being pinned at either end. This means the position is fixed, but the slope is free. In my experiment, however, the slope is not free and is fixed horizontal. I tried to mitigate this by squashing the foam a bit to try to allow it to take the slope that it wants to. This is clearly not a perfect solution.
I could have mounted the bar on a point, which would result in a pinned boundary condition. Though, when weight is applied this could result in the beam falling through the pivots.
¶ Closing
All in all, I did generate a value for the flexural modulus of foam. Will it be useful? Absolutely. Can I blindly trust it? Absolutely not. There are many flaws in the experiment, from the way I measured the deflection to the way I mounted the beam. The value I generated seems quite high. It will definitely be useful for some initial calculations and FEA, but it will need further refinement.
From here, I will make another test wing, longer than the one I have previously made. Now that I know the airfoil profile I can calculate the polar moment of area, which will allow me estimate the deflection of the wing. Then, through another experiment I will be able to refine my value of the flexural modulus.
¶ Correction
After sleeping on the problem, I have realised I made a great mistake. I knew that the value was off because I assumed the beam was pivoting, when in reality it was a fixed-fixed beam, or a double cantilever. When I did the integration, I did not enforce a slope boundary condition on the ends as I should have. Had I set a zero-slope condition at the ends, the deflection equation would be different. So, after hurriedly doing the integration whilst on a train, the following equation was obtained:
which is a factor of 4 smaller than what I had before. So, what the flexural modulus should be is actually around 120 Mpa, which is much more reasonable.
Apologies for the amateur mistake. I was tempted to quietly edit the page, but this site is all about documenting the process which occasionally includes making some mistakes along the way.